Curing A Slipping Focuser
Curing A Slipping Focuser
When I started using the Skywatcher 150p for my first forays into Astrophotography, I did so by attaching my DSLR camera to the factory fitted Crayford style focuser. Whilst a DSLR body itself doesn't weigh much, I did notice that after while, focusing seemed to be very tricky. On closer inspection, I found that at times, when I turned the focuser knob, there was no movement in the focus tube, and therefor the camera wasn't achieving focus on its objective. So, I decided to take it apart...Taking apart the focuser
Taking the focuser apart is easy. Very easy. On the 150p, the focuser is only held together by 4 screws marked by the red dots on the picture below. Take the screws all the way out and set them to one side.


When the plate is removed, the simplicity of the inner workings of the focuser is revealed.

Under the plate, you see that the focuser relies on nothing more than friction between the flattened edge of the focuser tube, and the bar that joins both the focus wheels together. Looking under the plate you have removed, you can see how the bar sits and is held into place.

The focus tube is free to be pulled out of the side of the telescope. While I had the focuser in pieces, I gave it all a clean, getting rid of some grime that had built up over time.

I had read that one way to improve the operation of these standard focuser was to do some work on the focus tube itself. Looking at the picture of the focus tube below, you can see two dark lines that appear along the edges of the flattened part of the tube shown with red arrows. This is where the friction is created, moving the tube towards and away from the secondary mirror. To increase the amount of friction created on the tube, I've read that you can take a piece of wet and dry sand paper wrapped around a small block, and gently rub the flat section. By doing this, you will gradually work down the edges of the flat section where the friction is created at the moment, and expose more of the tube to contact with the focus knob bar. Eventually, the friction will then be created across the whole width of the flat section, not just the edges.

Seeing how it all works, it was time to put everything back together by putting the tube back into place, replacing the focus wheels and finally reattaching the plate that holds it all together.
Stopping the slip
So far, this post has looked at the simple process of taking the focuser apart to find out how it works, and, if you want, where you can sand down to provide more surface area and friction to smooth out the operation of the focuser tube, In essence though, you don't need to do any of this if you only want to make a small adjustment and increase the friction placed on the tube and avoid the slippage.
All this is done by turning one small grub screw as pointed out with the screw driver below. In my case, I needed an allan key, but I suppose it is possible that some focusers might have a small screw there instead.
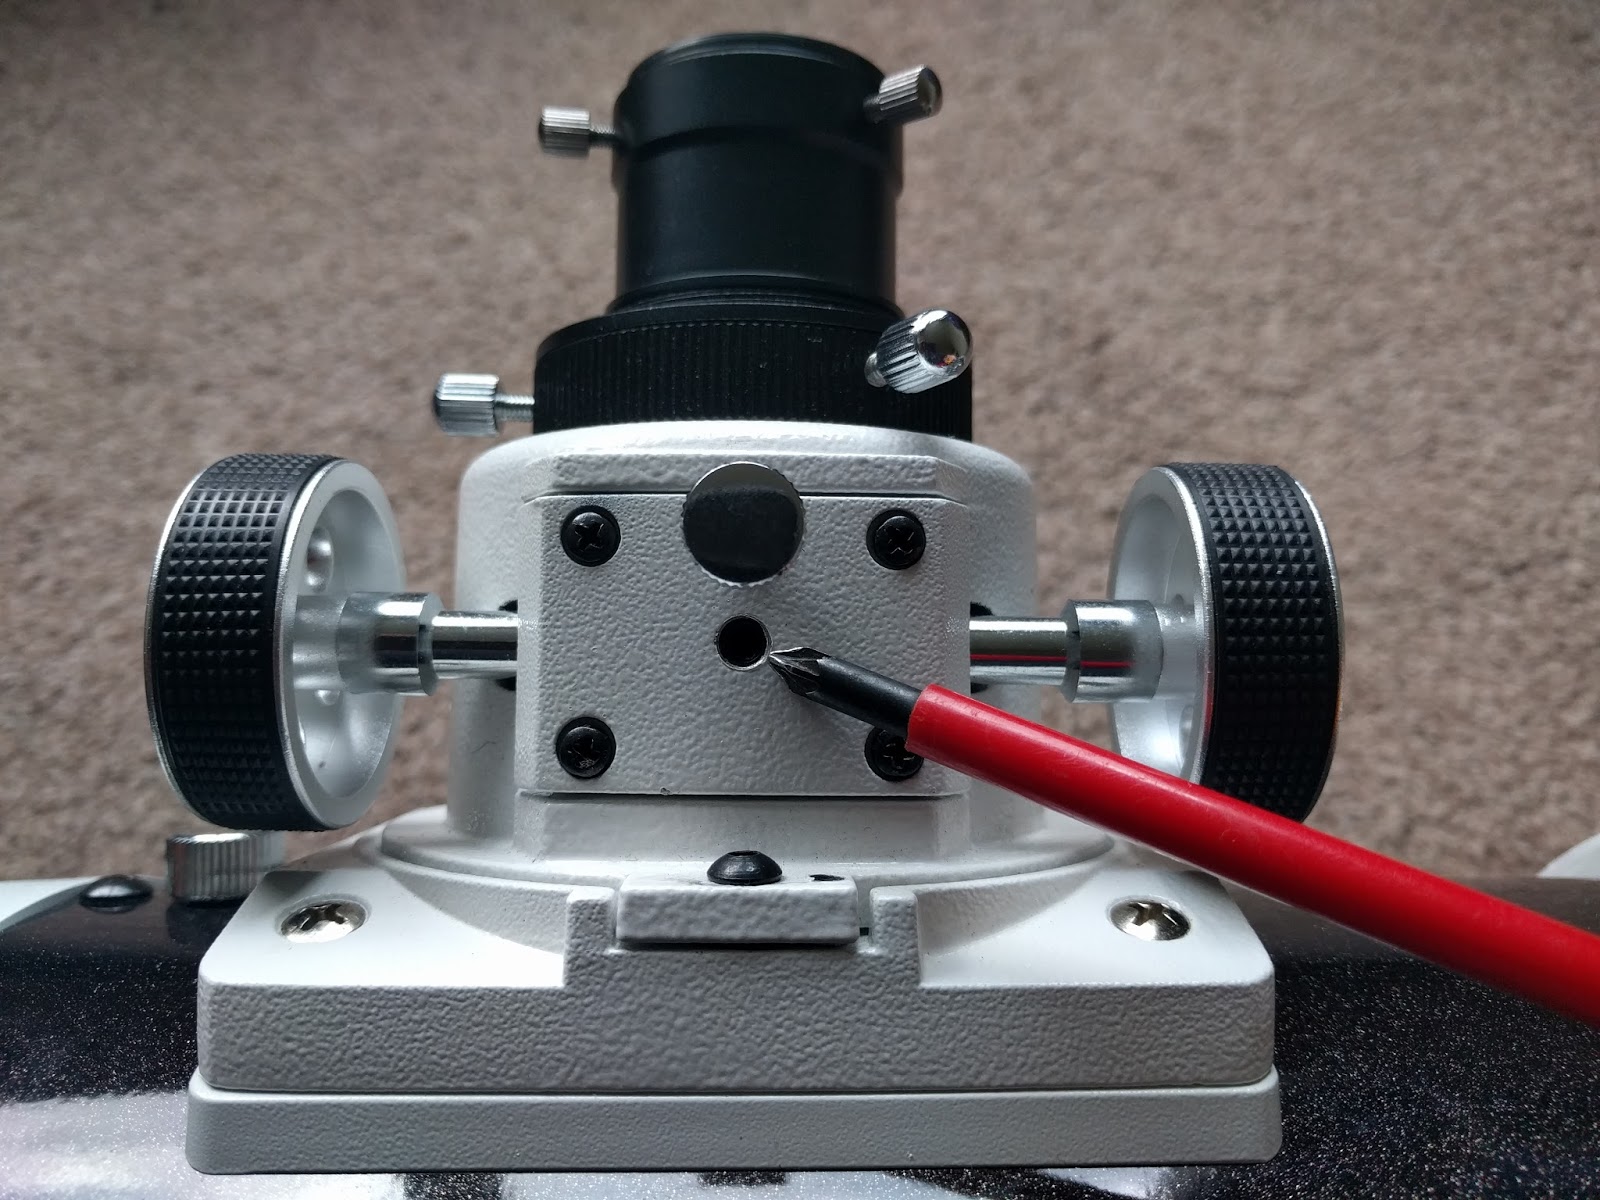
And there you have it. The grub screw tightened, camera attached and the tube moving in and out smoothly with no slipping. Tidy job.

This is all correct, I have also found. However, when tightening the centre grub screw, do not over-tighten as this may jam the focuser axle. If there are 2 screws either side of the centre grub screw (Phillips head on my SW RC6, hex key on my SW ED80) do not over-tighten, as these may be holding the clamp in place; over-tightening will work counter to the centre grub screw; loosen them when you tighten the centre grub screw, then gently firmly seat the other 2 screws - that's all.
ReplyDelete