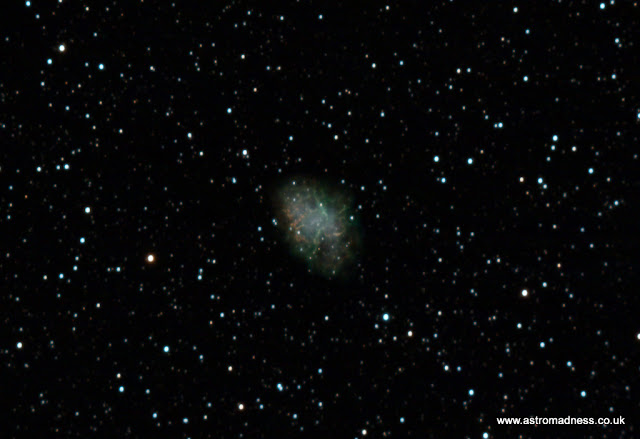
M1 - The Crab Nebula in Hypercamvision
M1 - The Crab Nebula
Setting Up
This Christmas gave me a small opportunity to get out under the stars. I took that opportunity with both hands. Thanks to friends and family, I've also been lucky to receive some Astro gifts that I was itching to get stuck into. During recent weeks, I noticed an astro friends image of M1 taken with a CCD camera. I found it really impressive, and incredibly detailed. It inspired me to see what the Hypercam would make of it.
So, on the night, I set up out the back garden, got the mount polar aligned and fulfilled the 2 star alignment process with 2 calibration stars, fitted the Hypercam with my new LP filter and connected everything up in the obsy shed ready to go. I was pleased to see that my alignment routines were spot on as I turned up the image gain and saw the outline of the Crab Nebula almost dead centre of the screen in my initial test frames.
My previous uses of the Hypercam have concentrated on getting around an hour of exposures on each target. I have asked myself what difference a longer exposure period would make in my previous sessions, so I decided to dedicate the whole night to just imaging this one target. So, with that in mind, I set Sharpcap Pro up to take 60 second exposures at 1500 gain and set the time for 3 hours. This would give me plenty of data to work with, along with sufficient time to collect bias, flat and dark frames too.
With a longer session planned, I also set up remote access to the kit outside from the comfort of the living room allowing me to keep a real-time eye on the data being collected.
Data Collected
There wasn't much more to the night. I just sat back and let the camera and scope do the work, I backed the data up straight away and brought a copy indoors before calling it a night. The following day, I counted up the total number of frames I captured which reached 176 x 1 minute exposures.
Also this Christmas, I was fortunate enough to be able to use some Christmas money to put towards a license for PixInsight, and a book to accompany it. PixInsight is initially quite daunting. There are so many tools and scripts to use within it, but with some previous experience using it under a trial license, things start to make a bit more sense. One very useful process I have found recently is Blink. This allows you to load up all the frames into one viewer, and then skip through them quickly, allowing you to identify frames for rejection that might have meteor trails, satellite trails, or aircraft trails streaking through them. I easily identified 3 or 4 frames for rejection and deleted them from the list.
One day, I'll post more in depth about my work flow in PixInsight, but I don't know anywhere near enough about how it works yet. I'm still learning! Nevertheless, the remaining frames were stacked and calibrated with the dark, flat and bias frames too. I've used a workflow compiled from a few sources that seems to work well for nebulae. In fact, I attempted the stacking process and processing process twice. My first attempt was in the more familiar Deep Sky Stacker with processing in PixInsight and CS2, but this was a slightly rushed job. The second attempt was completed almost completely within PixInsight with a small final tweak in The GIMP 2.9
The Results
Two attempts and two quite different images. Both these are using the same amount of light and calibration frames, but processed differently.


Comments
Post a Comment